Photopea is a free photo editor that runs in your browser, with nothing to install and no account. Putting a HUD Drop badge or overlay effect on your YouTube thumbnail there takes a few minutes. The badges and overlays are transparent PNGs, so your thumbnail shows through wherever the art is empty.
Before you start
- Photopea: open photopea.com in any browser. It's free, and your files stay on your computer.
- Your thumbnail or a game screenshot. YouTube's recommended size is 1280×720.
- A badge from HUD Drop's free Thumbnail Badges and, if you like, an effect from Overlays.
1. Open your thumbnail
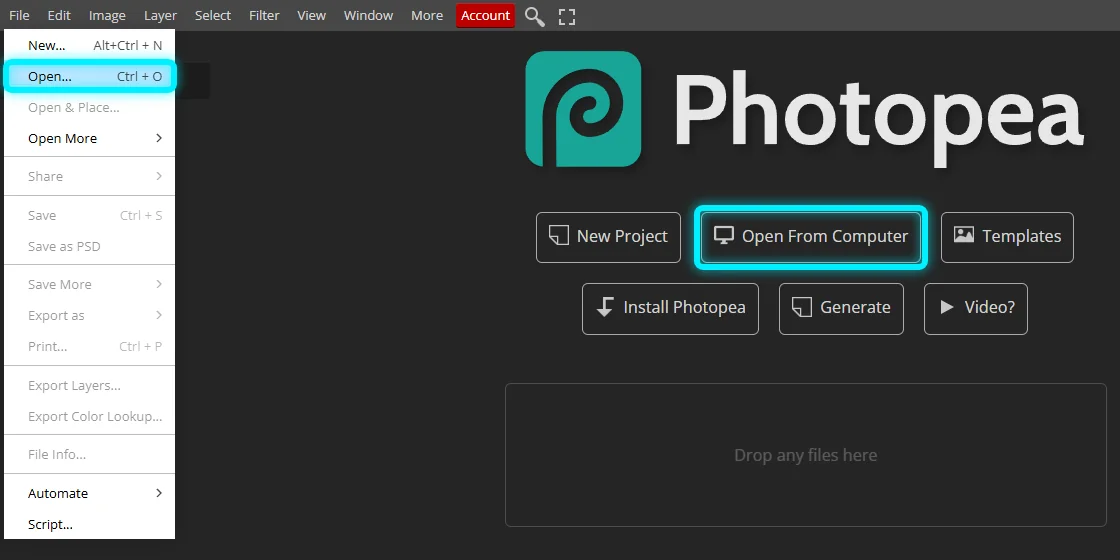
Choose File › Open (Ctrl+O), or click Open From Computer on Photopea's start screen. You can also drag the image onto the page.
2. Place the badge on top
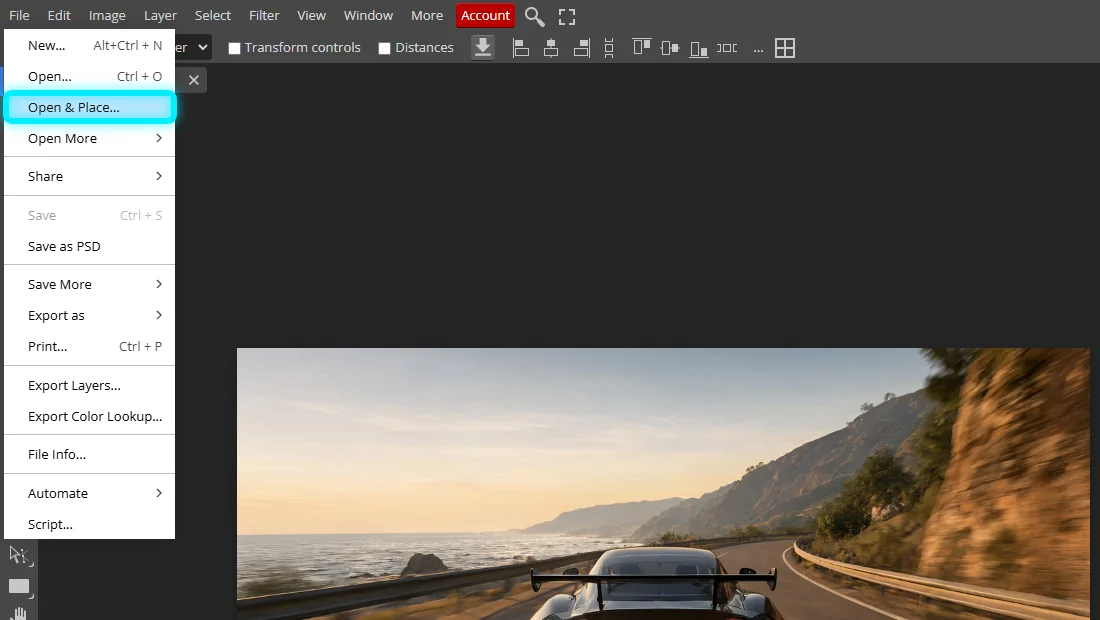
With your thumbnail open, choose File › Open & Place… and pick the badge PNG. Photopea adds it as a new layer above your thumbnail and keeps its transparency. Dragging the PNG onto the open image does the same.
3. Resize and move it
Photopea scales the badge to fit your thumbnail and puts resize handles around it. Drag a corner handle to shrink it; the width and height stay in proportion. Then drag inside the box to move it. Press Enter, or click the check mark in the top bar, to finish.
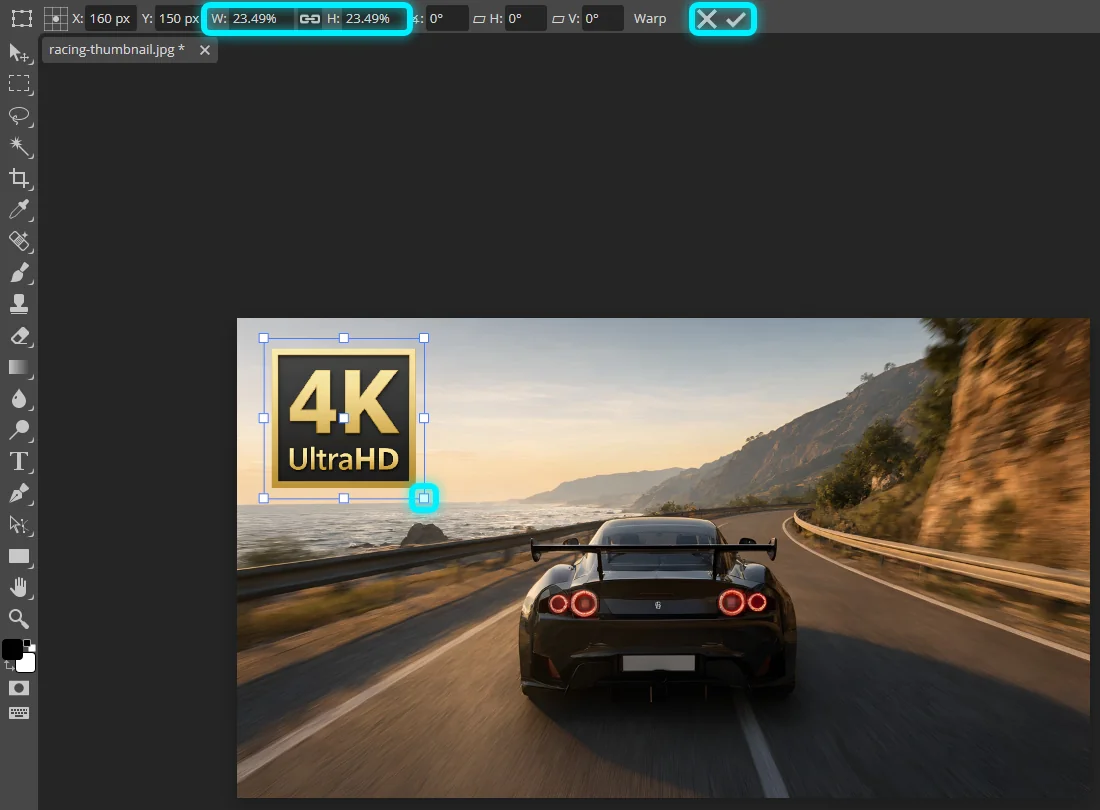
Keep badges out of the bottom-right corner, where YouTube shows the video's length.
4. Add an overlay effect and soften it
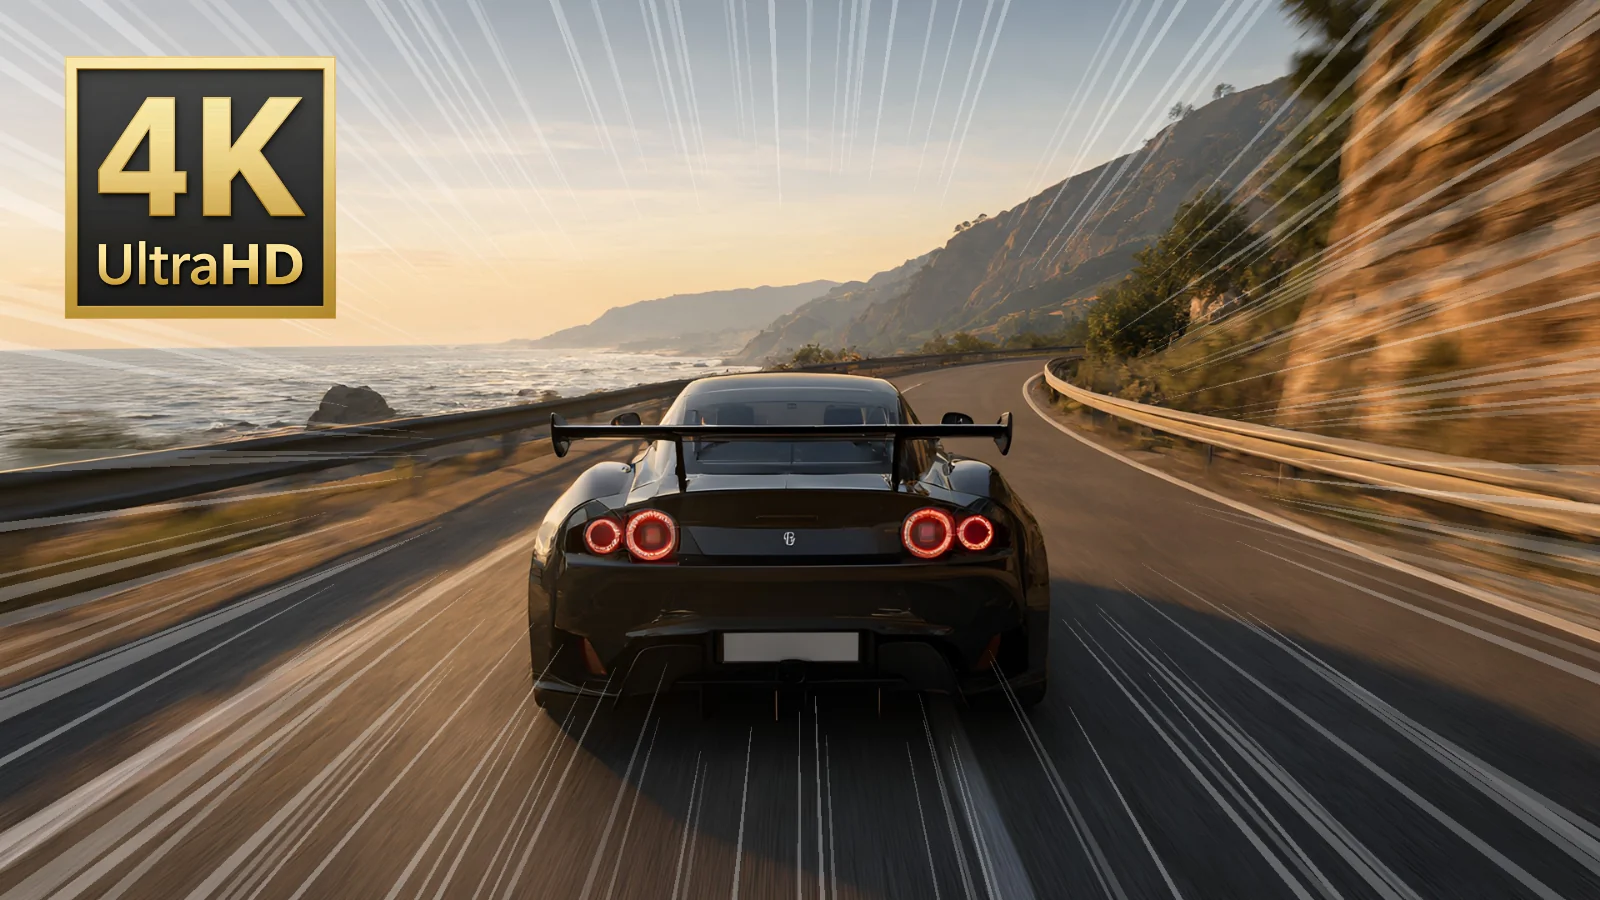
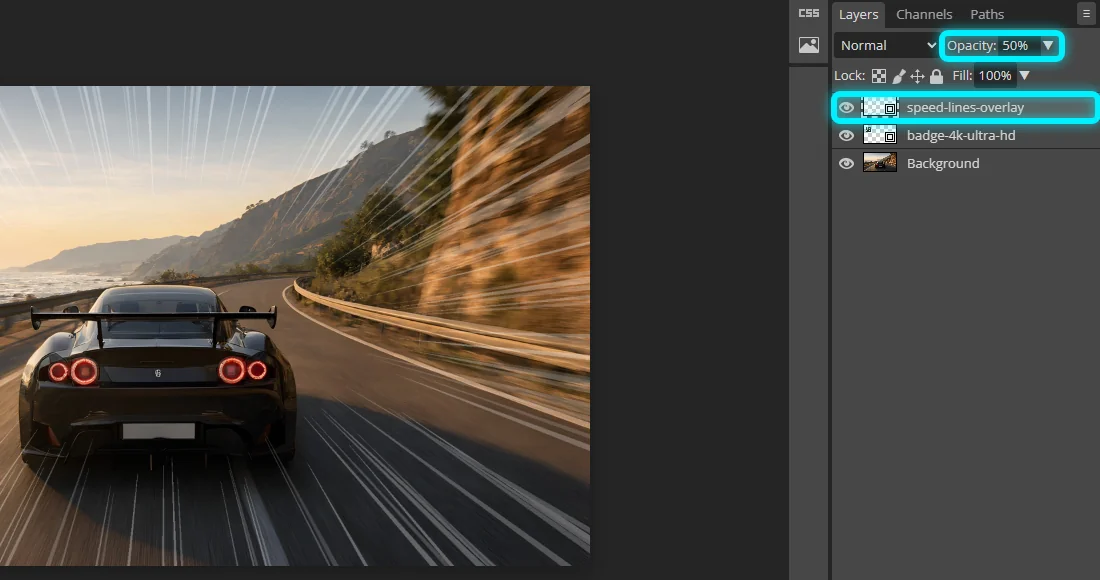
Place an effect the same way, with File › Open & Place…. HUD Drop overlays are 1920×1080, so Photopea scales them to fill a 1280×720 thumbnail exactly; press Enter to accept. Effects can be strong at full strength, so with the overlay's layer selected, lower Opacity at the top of the Layers panel. Around 40–60% usually looks right.
5. Put the badge back on top
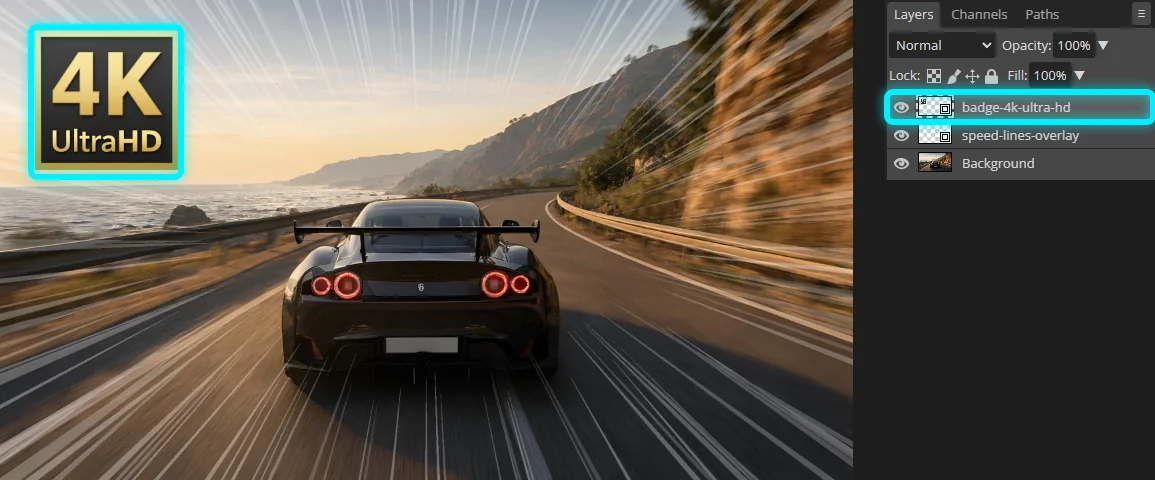
A placed PNG lands above the selected layer, so the speed lines now cross the badge. In the Layers panel, drag the badge layer to the top of the list. The layer at the top is in front of everything below it.
6. Export your thumbnail
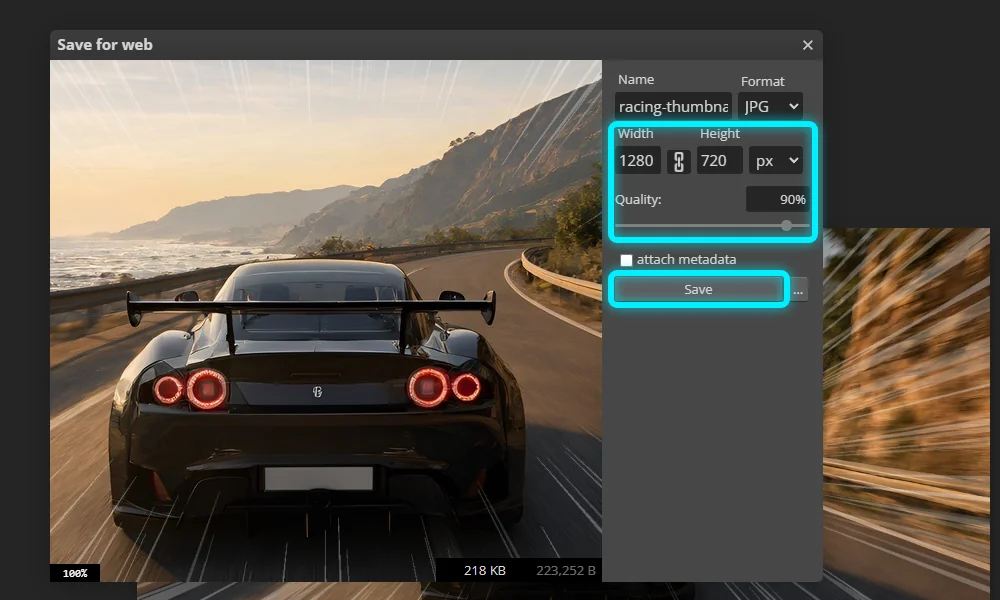
Choose File › Export as › JPG. In the Save for web window, check that the size is 1280×720, set Quality to about 90%, and click Save. Photopea downloads the JPG, ready to upload to YouTube.
Common questions
Is Photopea free? Do I need an account?
It's free, with ads beside the editor, and you don't need an account for anything in this guide.
Are my images uploaded anywhere?
No. Photopea runs on your own computer, so the thumbnail and the PNGs never leave it.
Can I use HUD Drop badges in monetized thumbnails?
Yes. They're free for monetized videos, streams and thumbnails, with no credit needed. See the license.
Why does my badge have a white box around it?
That image has a solid background instead of transparency, which is common with pictures saved from search results. HUD Drop's badges are transparent PNGs: use the PNG download button on the badge's page.
Does this work in Photoshop?
Almost exactly. Photoshop calls it File › Place Embedded instead of Open & Place, and Free Transform is Ctrl+T.